Cloudera Hadoop Web Continue Installation Centos 7
In this article, we described the step by step process to install Cloudera Manager as per industrial practices. In Part 2, we already have gone through the Cloudera Pre-requisites, make sure all the servers are prepared perfectly.
Requirements
- Best Practices for Deploying Hadoop Server on CentOS/RHEL 7 – Part 1
- Setting Up Hadoop Pre-requisites and Security Hardening – Part 2
Here we are going to have 5 node cluster where 2 masters and 3 workers. I have used 5 AWS EC2 instances to demonstrate the installation procedure. I have named those 5 servers as below.
master1.tecmint.com master2.tecmint.com worker1.tecmint.com worker2.tecmint.com worker3.tecmint.com
Cloudera Manager is an administrative and monitoring tool for the entire CDH. We admin usually calling it a management tool for Cloudera Hadoop. We can deploy, monitor, control, and make configuration changes with the use of this tool. This is very much essential to manage the entire cluster.
Below are the important uses of Cloudera Manager.
- Deploy and configure Hadoop clusters in an automated way.
- Monitor cluster health
- Configure alerts
- Troubleshooting
- Reporting
- Making Cluster Utilization Report
- Configuring Resources dynamically
Step 1: Installing Apache Web Server on CentOS
We are going to use the master1 as a webserver for Cloudera repositories. Also, Cloudera Manager is WebUI, so we need to have Apache installed. Follow the below steps to install the apache web server.
# yum -y install httpd
Once installed httpd, start it and enable so that it will be started on boot.
# systemctl start httpd # systemctl enable httpd
After starting httpd, ensure the status.
# systemctl status httpd
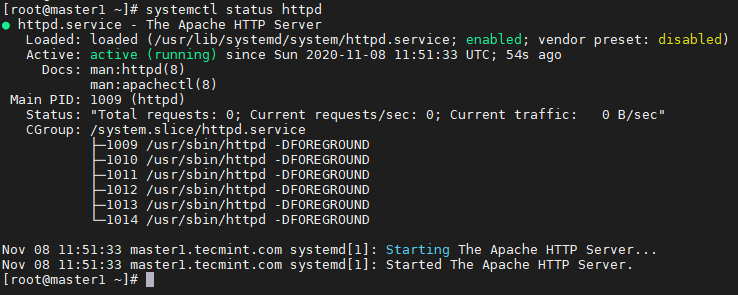
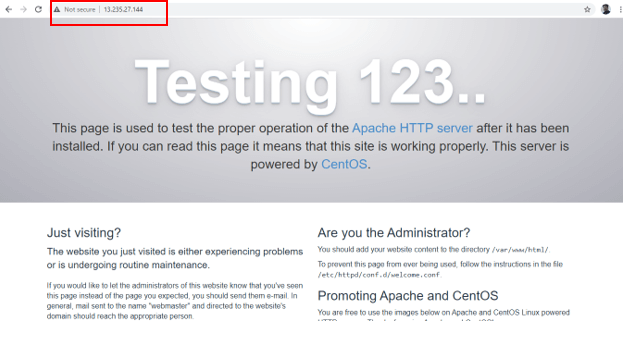
After starting httpd, open a browser in your local system and paste the IP address of master1 in the search bar, you should get this test page to make sure httpd is running fine.
Step 2: Configure Local DNS to Resolve IP and Hostname
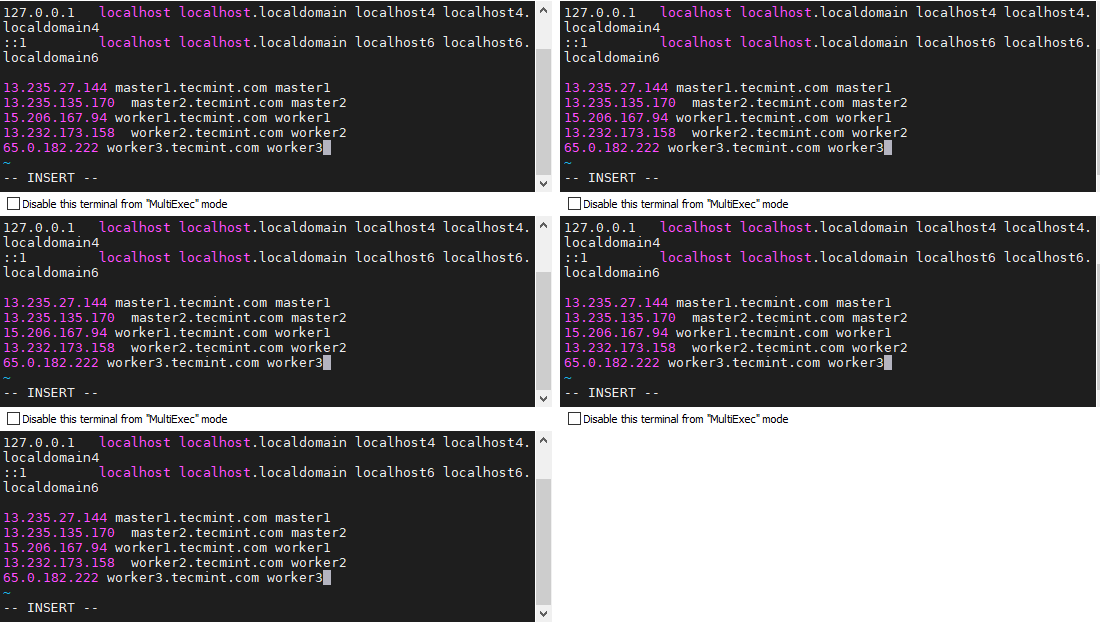
We need to have a DNS server or configure /etc/hosts to resolve IP and hostname. Here we are configuring /etc/hosts, but in real-time, a dedicated DNS server will be there for the production environment.
Follow the below steps to make an entry for all your servers in /etc/hosts.
# vi /etc/hosts
This should be configured in all the servers.
13.235.27.144 master1.tecmint.com master1 13.235.135.170 master2.tecmint.com master2 15.206.167.94 worker1.tecmint.com worker1 13.232.173.158 worker2.tecmint.com worker2 65.0.182.222 worker3.tecmint.com worker3
Step 3: Configure SSH Passwordless Login
Cloudera Manager is being installed on master1 in this demonstration. We need to configure password-less ssh from master1 to all other nodes. Because the Cloudera Manager will use ssh to communicate all other nodes to install packages.
Follow the below steps to configure password-less ssh from master1 to all remaining servers. We are going to have a user 'tecmint' to proceed further.
Create a user 'tecmint' all 4 servers using useradd command as shown.
# useradd -m tecmint
To give the root privilege to the user 'tecmint', add the below line into /etc/sudoers file. You can add this line under root as give in the screenshot.
tecmint ALL=(ALL) ALL

Switch to user 'tecmint' and create ssh key in the master1 using the below command.
# sudo su tecmint $ ssh-keygen
Now copy the created key to all 4 servers by using the ssh-copy-id command as shown.
$ ssh-copy-id -i ~/.ssh/id_rsa.pub [email protected] $ ssh-copy-id -i ~/.ssh/id_rsa.pub [email protected] $ ssh-copy-id -i ~/.ssh/id_rsa.pub [email protected] $ ssh-copy-id -i ~/.ssh/id_rsa.pub [email protected]
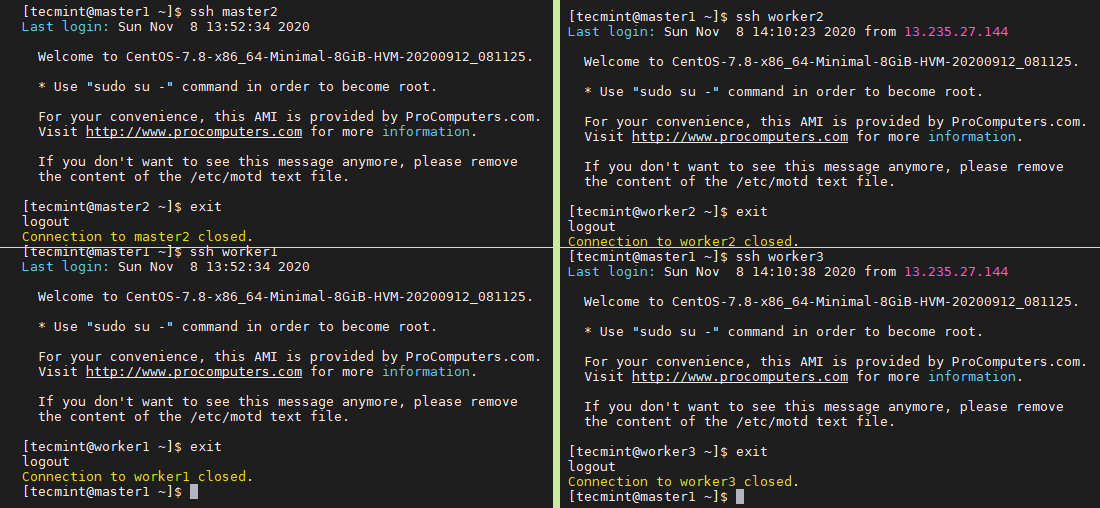
Now you should be able to ssh from master1 to remaining all servers without a password as shown.
$ ssh master2 $ ssh worker1 $ ssh worker2 $ ssh worker3
Step 4: Installing and Configuring Cloudera Manager
We can use the vendor (Cloudera) repository to install all the packages using the package management tools in RHEL/CentOS. In real-time, creating our own repository is the best practice because we may not be having internet access in the production servers.
Here we are going to install Cloudera Manager 6.3.1 release. Since we are going to use master1 as the repo server, we are downloading the packages in the below-mentioned path.
Create the below-mentioned directories on master1 server.
$ sudo mkdir -p /var/www/html/cloudera-repos/cm6
We can use the wget tool to download packages over http. So, install wget using the below command.
$ sudo yum -y install wget
Next, download the Cloudera Manager tar file using the following wget command.
$ wget https://archive.cloudera.com/cm6/6.3.1/repo-as-tarball/cm6.3.1-redhat7.tar.gz
Extract the tar file into /var/www/html/cloudera-repos/cm6, already we have made master1 as webserver by installing http and we have tested on the browser.
$ sudo tar xvfz cm6.3.1-redhat7.tar.gz -C /var/www/html/cloudera-repos/cm6 --strip-components=1
Now, verify that all the Cloudera rpm files are there in /var/www/html/cloudera-repos/cm6/RPMS/x86_64 directory.
$ cd /var/www/html/cloudera-repos/cm6 $ ll
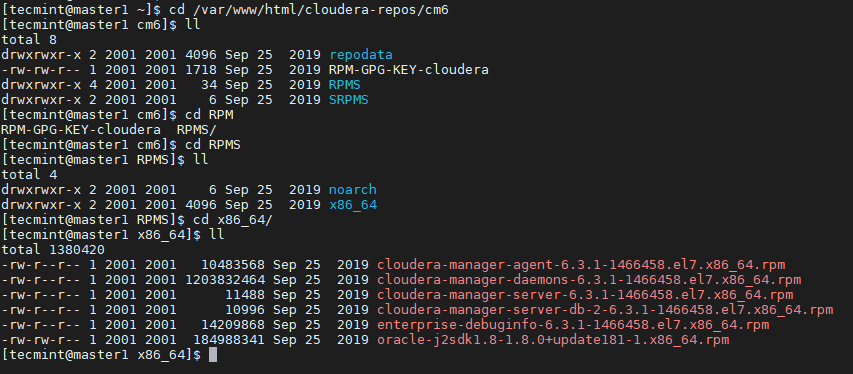
Create /etc/yum.repos.d/cloudera-manager.repo files on all servers in the cluster hosts with the following content, here master1 (65.0.101.148) is the Web server.
[cloudera-repo] name=cloudera-manager baseurl=http:///cloudera-repos/cm6/ enabled=1 gpgcheck=0
Now the repository has been added, run the below command to view the enabled repositories.
$ yum repolist

Run the below command to view all the available Cloudera related packages in the repository.
$ yum list available | grep cloudera*

Install cloudera-manager-server, cloudera-manager-agent, cloudera-manager-daemons cloudera-manager-server-db-2.
$ sudo yum install cloudera-manager-daemons cloudera-manager-agent cloudera-manager-server cloudera-manager-server-db-2
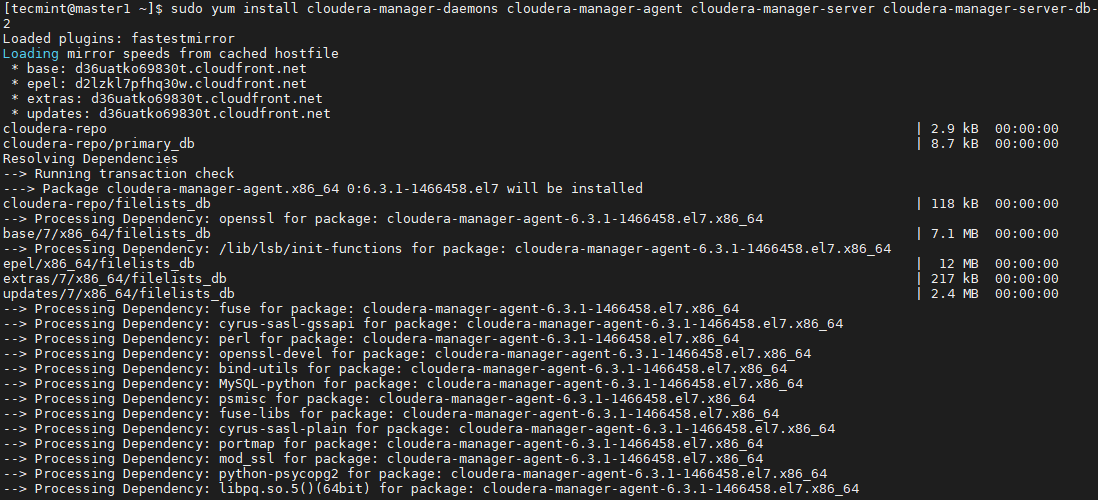
Run the below command to view all the installed Cloudera packages.
$ yum list installed | grep cloudera*

Run the below command to start the cloudera-scm-server-db which is an underlying database to store Cloudera Manager and other services metadata.
By default, Cloudera is coming up with postgre-sql which is embedded in the Cloudera Manager. We are installing the embedded one, in a real-time external database that can be used. It can be Oracle, MySQL, or PostgreSQL.
$ sudo systemctl start cloudera-scm-server-db
Run the below command to check the status of the database.
$ sudo systemctl status cloudera-scm-server-db
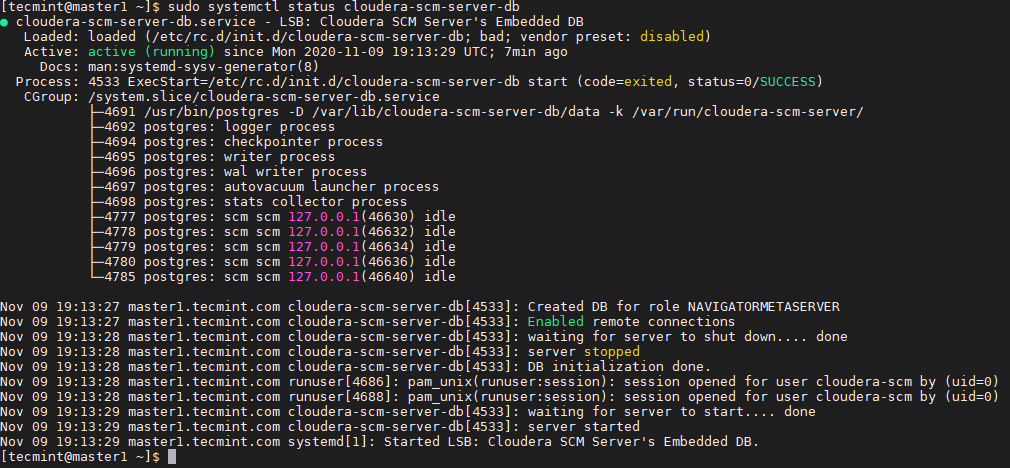
Configure the db.properties for the Cloudera Manager server.
$ vi /etc/cloudera-scm-server/db.properties
Configure the below value is EMBEDDED to make Cloudera Manager use the Embedded Database.
com.cloudera.cmf.db.setupType=EMBEDDED
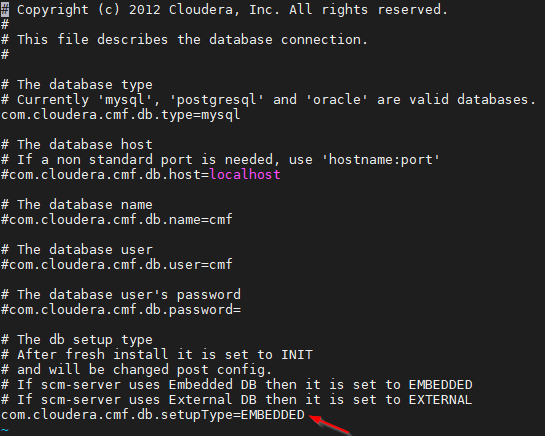
Run the below command to start the Cloudera Manager server.
$ sudo systemctl start cloudera-scm-server
Run the below command to check the status of the Cloudera Manager server.
$ sudo systemctl status cloudera-scm-server

Run the below command to start and check the status of the Cloudera Manager agent.
$ sudo systemctl start cloudera-scm-agent $ sudo systemctl status cloudera-scm-agent

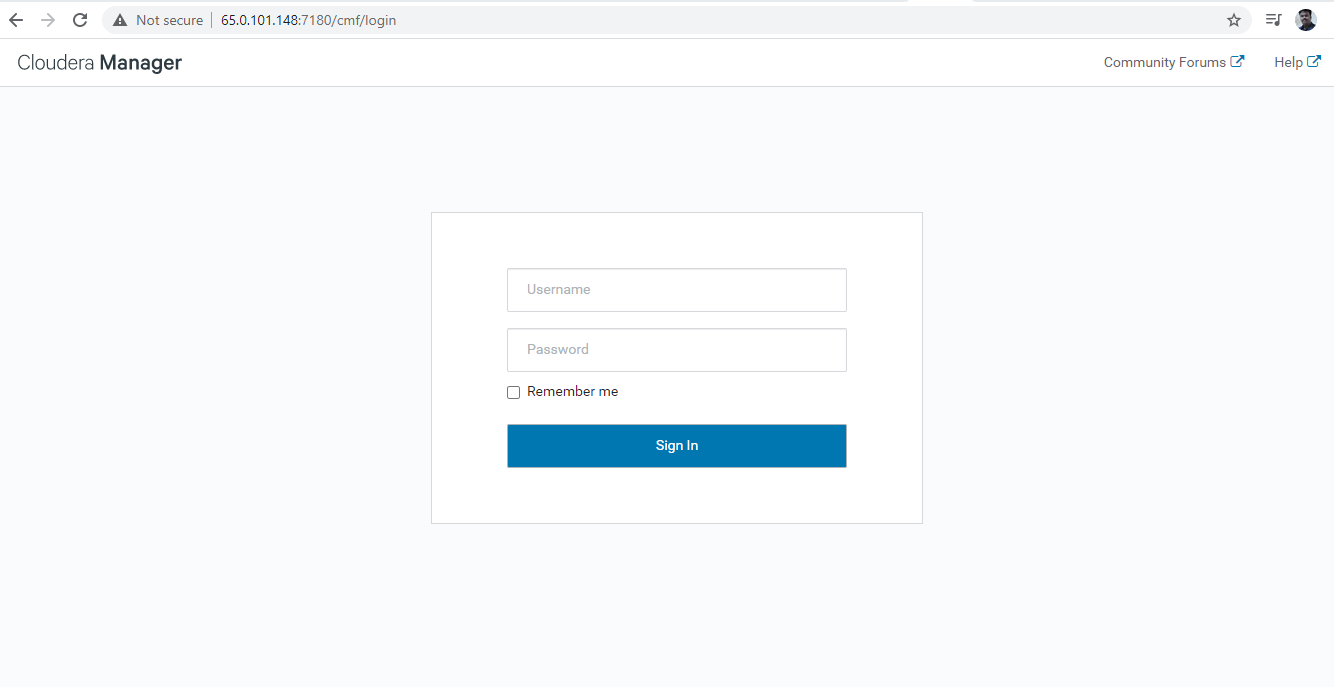
Once the Cloudera Manager Server successfully up and running fine, you can view the WebUI (Login page) in the browser using IP address and port number 7180 which is the port number of Cloudera Manager.
https://65.0.101.148:7180
Summary
In this article, we have seen step by step process for installing Cloudera Manager on CentOS 7. We will see the CDH and other service installations in the next article.
If You Appreciate What We Do Here On TecMint, You Should Consider:
TecMint is the fastest growing and most trusted community site for any kind of Linux Articles, Guides and Books on the web. Millions of people visit TecMint! to search or browse the thousands of published articles available FREELY to all.
If you like what you are reading, please consider buying us a coffee ( or 2 ) as a token of appreciation.

We are thankful for your never ending support.
Source: https://www.tecmint.com/install-cloudera-manager-on-centos/
0 Response to "Cloudera Hadoop Web Continue Installation Centos 7"
Post a Comment